Draft a Deal

Draft a deal for the customer, in the following 5 simple steps:
- Add Customer, Asset, and Trade-in
- Add Add-ons
- Specify Lender and Deal Type
- Populate Nine View Box
- Select, Compare, and Save Deal
After the deal is drafted, it will show up in the Deals section with the tag Draft.
Add Customer, Asset, and Trade-in
To create a draft deal, the first step is to add customer, asset, and trade-in (optional).
Once customer details are added and the required asset is selected, the Nine Box View will populate, where dealer can modify the Down Payment, Term, Rate, and Balloon amounts to create nine different options for the customer to choose from.
Add Customer
To add a customer, click Add Customer, this will open the Enter Customer's Details popup:

In the Enter Customer's Details popup:
- Enter customer's Email Address
- Select a Preferred Communication method (mobile or email)
- Select a Credit Score
- Click Save Changes
The credit score ratings available for selection are specified by the Dealer Admin and Lender. The ranges may very depending on the configuration.
When a new customer is added, with preferred communication method as email, they will receive an email notifying them about the deal.
Add Asset
To add an asset, click Add Vehicle, this will open the Asset Selection popup:
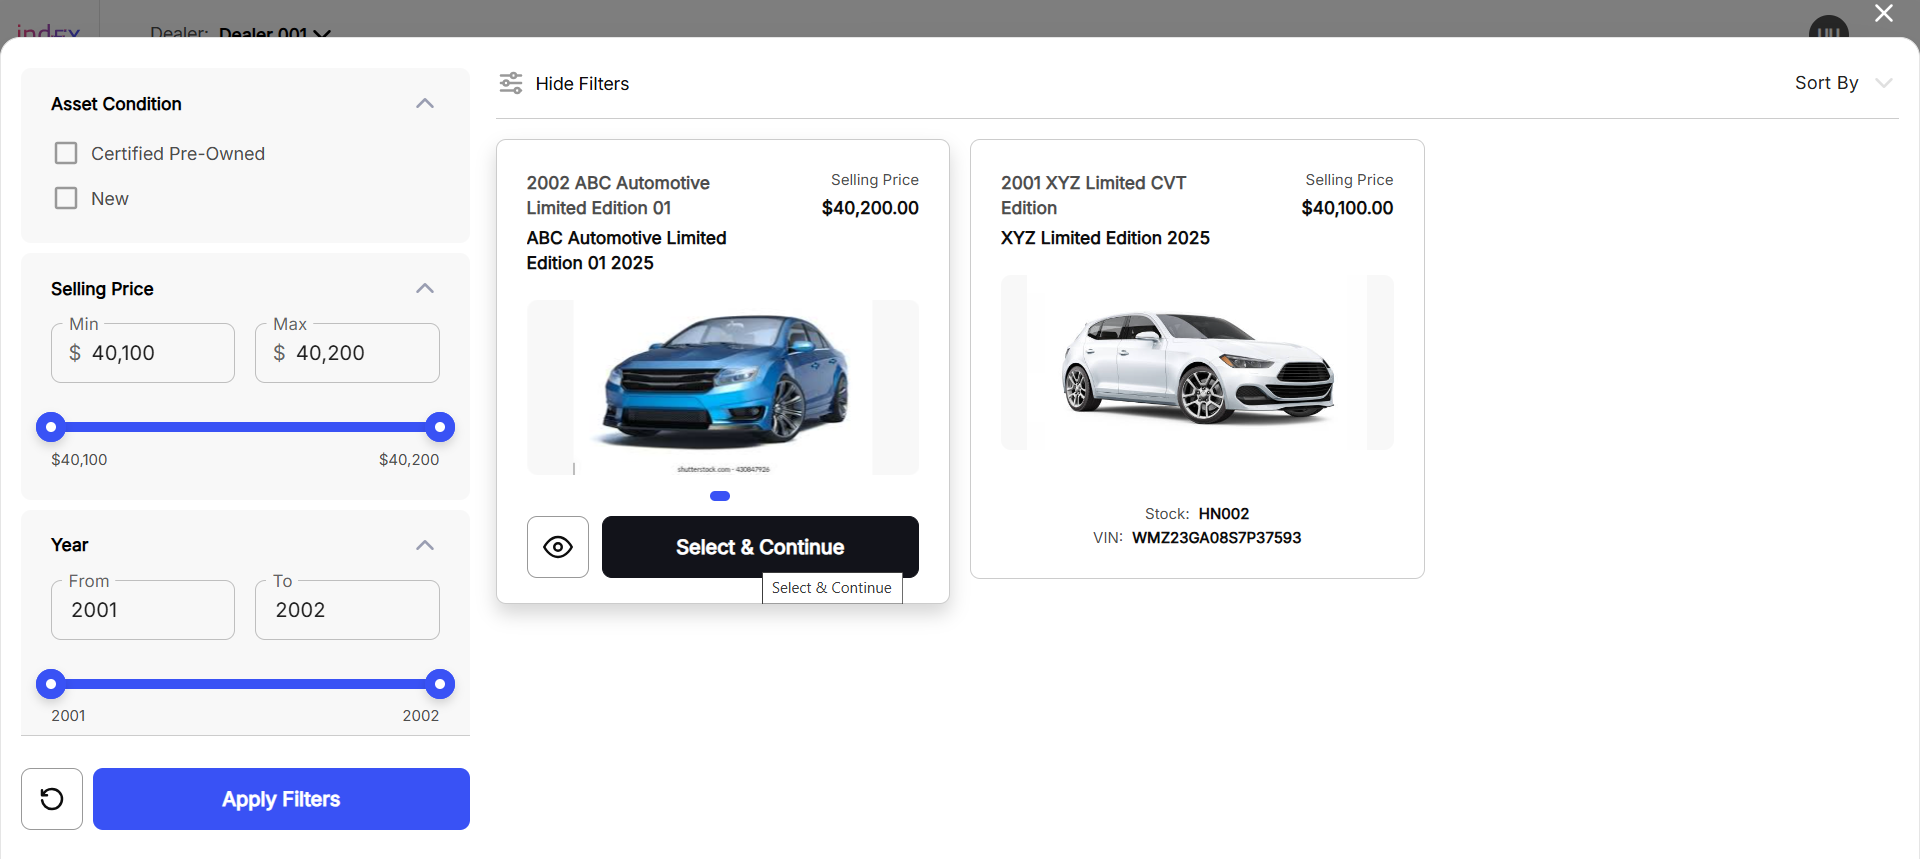
In the Asset Selection popup:
- Apply filter to search the desired asset
- Click Select & Continue on the desired asset
Selecting an asset will instantly populate all the monetary details of the asset in the Nine Box View.
Add Trade-in
To add a Trade-in, click Add Trade-in, this will open the Trade-in popup:

In the Trade-in popup:
- Provide the Year, Make, Model, Trim (optional), Current Mileage, VIN (optional), and Trade-in Amount
- Specify the Condition of the Vehicle
- Specify Is asset titled in customer's name?
- Specify Does the customer have lease/loan balance?
- Upload trade-in asset images
If Yes is selected for Does the customer have lease/loan balance?, you need to populate the following additional fields:
- Contract No. / Credit Reference
- Lender Name, Address, and Phone Number
- Payment Type and Payoff Amount (within 10 days)
Add Add-ons
The Add-ons section is disabled until an asset is selected against which the add-on is going to be added.
To add Add-ons, click Add Add-ons, this will open the Add Products popup:

You might see additional option, other than Add-ons. These options are subject to availability, selected asset, Lender and Dealer Admin configurations. Some of the options might not be available or show up as empty.
In the Trade-in popup:
- Filter the desired products
- Select what you want to add
- Click Continue
You can also create and add new Add-ons. To create a new Add-on, click Create New Add-on, this will open the Create New Add-on popup:

In the Create New Add-on popup:
- Enter the Product Name
- Add a Description
- Select an add-on Category
- Select the Vehicle Condition
- Enter a Part No (optional)
- Add a Supplier
- Enter the Price of the add-on
- Provide the add-on's Brochure URL (optional)
- Provide the add-on's Video URL (optional)
- Upload add-ons images
- Click Save Add-on
Installed Mode and Compatible Vehicles options are preselected and disabled by default. These defaults are subject to availability, selected asset, Lender and Dealer Admin configurations.
Specify Lender and Deal Type
The third step is to specify Lender and Deal Type (finance, lease, or cash).

To specify a Lender, on the left side of the Deal Desk, inside the Draft card:
- Click the Lender dropdown
- Select the desired lender
The availability of multiple lenders is subject to availability based on the selected asset, Lender, and Dealer Admin configuration.
To specify a Deal Type, click Finance, Lease, or Cash.
Switching between Finance and Lease will instantly repopulate the Nine Box View with amounts based on your selection.
Populate Nine View Box
The forth step is to modify and populate Nine View Box. In Nine Box View, dealers can compare financing scenarios side by side.

Dealer can modify the following to create nine different options for the customer to choose from.
For Finance:
- Selling Price
- Down Payment
- Term
- Rate
For Lease:
- Selling Price
- Down Payment
- Term
- Miles
- Rate
- RV
Once an options from the Nine View Box is selected — on the right side of the Deal Desk — dealers can view a detailed breakdown for:
- FA/Gross Capitalized Cost
- Due at Signing
- Capitalized Cost Reduction
- NFA/Adjusted Capitalized Cost
- Payment Details
Select, Compare, and Save Deal
This is the final step. Dealer can select a deal option from the Nine View Box and save the deal, which will show up on the Deal dashboard under Deals for further processing.
Lane also allows you to compare multiple deals for multiple assets to get the best possible deal for both you and the customer. To add multiple assets for comparison:
- Select a deal from the Nine View Box
- Click the icon highlighted in the image below

Clicking the icon highlighted above will open the Comparison View:

To add assets for comparison, click Add Vehicle:

Once the desired deal is selected, to save the deal for further processing, click Save & Continue:
In order to save and continue the deal, you must add a customer first, if one hasn't been added already.
Customer email cannot be changed after a draft deal is saved.
