Finalize Deal
In the last section, a credit application was send to Lenders for them review and accept. If the deal is accepted by a single or multiple lenders, the next step for the dealer is finalize and close the deal.
Deals for which the lender(s) have accepted the credit application, will show up as Fully Received on the Deals page.
The Lender(s) may ask for some changes in the credit application before approving it. In this case the credit application will show up as Conditioned on the Deals page.
Fully Received
At this stage, the credit application has been fully received. Dealers can choose either to continue with the Lenders who have approve the credit application, or if the conditions aren't acceptable then send the credit application to more lenders.

To continue finalizing the deals, select a lender and click Continue Order:

Once you click the Continue Order button in the previous step, the deal is marked as Approved and will show up as such on the Deals page.
Continue Deal
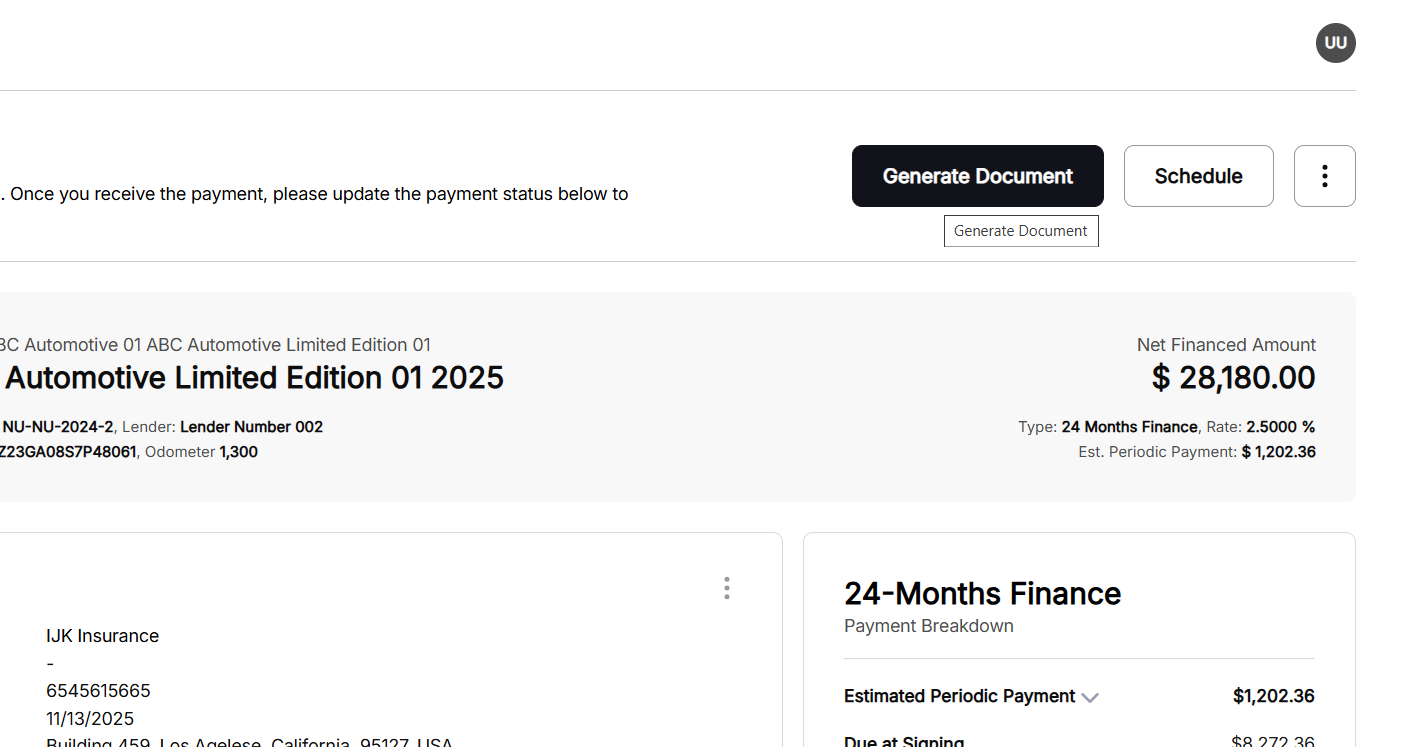
In this section, generate and add documents, and provide insurance details:

Sign Documents
In the Generated Documents section, you can:
- Sign the documents online
- Download document
- Upload signed documents
- Print documents
Unlock the signing session to start signing the documents. To unlock signing session, click the icon and select Unlock Signing Session:
Once the signing session is unlocked, click the icon against documents with icon and select Sign as Customer or Sign as Dealer:

Add Insurance Details
Input insurance details for the approved deal. To add insurance details, click the icon and select Add Insurance:

Insurance can be made mandatory or optional via configurations in Index.
Once Add Insurance is clicked, it will open the Insurance popup:

Next Step
To move forward to the next step of the process, click Continue Deal.
The Continue Deal button will remain disabled until insurance details are provided and documents have been signed by both the customer and the dealer.

Sign & Pay
In this section, you need to sign additional documents and make the payment(s) for the asset:

Sign Additional Documents
Unlock the signing session to start signing the documents.
To unlock signing session, click the icon against Generated Documents and select Unlock Signing Session.
Once the signing session is unlocked, click the icon against documents with icon and select Sign as Customer or Sign as Dealer.
Add Payments Details
To make the payment(s) for the asset, click the icon against Payment Details:

Once the icon against Payment Details, this will open the Add Payment Details popup:

The following Payment Modes are available:
- Credit Card
- ACH
- Cheque
In case of check you need to add Cheque number as well.
You can utilize multiple payment methods to make the full payment. Unpaid amount will show up as outstanding amount with the status of Partially Paid:

Next Step
To move forward to the next step of the process, click Continue Deal.
The Continue Deal button will remain disabled until payment details are added and documents have been signed by both the customer and the dealer.
Schedule Pickup/Delivery
In this section, you need to schedule a pickup or delivery of the asset, click on Schedule Appointment to start scheduling:

Once Schedule Appointment is clicked, this will open the Schedule Appointment popup:

In Schedule Appointment popup you can either specify an In-Store Pickup or Delivery for the asset, and then click Confirm Appointment.
Time-zone is dealer based by default, you can now change the timezone manually while scheduling appointments. Available times for scheduling will be updated automatically and accordingly.
Complete Deal
Mark deals as finalized once all steps are completed. The following is the Appointments view on Deal Desk.

The following the Complete Deal view.
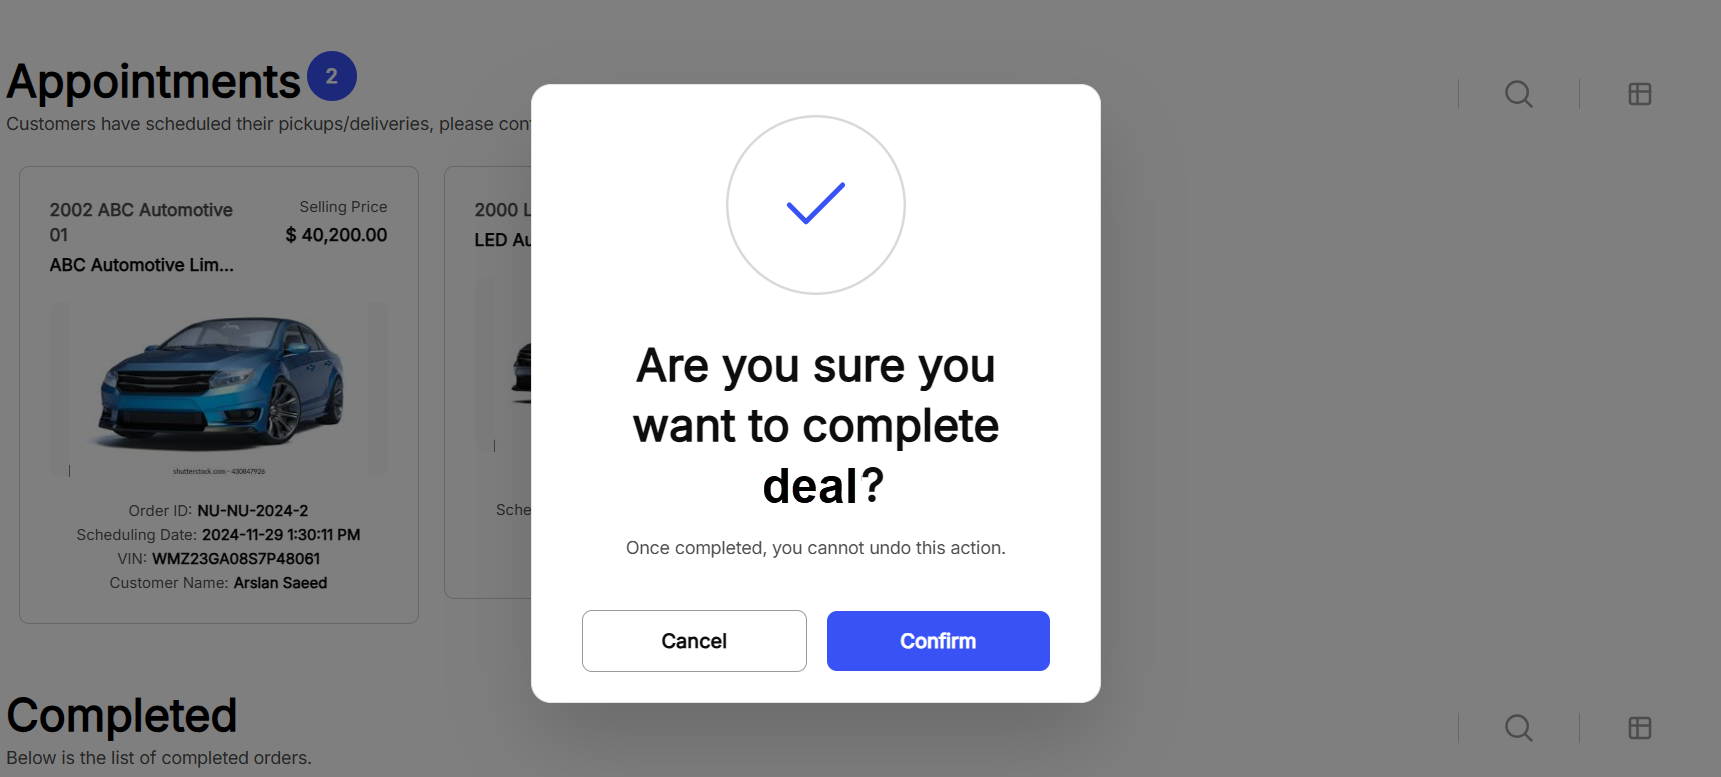
The following the Deal Completed view.
